Tuesday, September 17, 2013

One Stroke Flowers (Adventures with Acrylic Paints!)


Hey Guys!  It's Lisl.  I am just so excited to share this new manicure with y'all!  This is my first foray into the one stroke technique!  I first saw pictures of one stroke flowers on Pshiiiit, and knew I had to give them a try.  


Thursday, September 12, 2013

Slow Swatching: A England - She Walks in Beauty


Hey y'all it's Lisl!  Today I'm starting a new feature I dreamed up when I got a lot of new nail polish for my birthday.  It's called slow swatching, and it's where I swatch a single color at a time and dream up a little bit of nail art to go with it!  

Today I'm showing you A England's She Walks in Beauty, which is one of the three excellent polishes Arden got me for my birthday!  My ultimate goal for this swatch was to do a manicure inspired by one of my favorite places in the world, the Metolius River in Oregon, where my family and I have gone camping every year since I was but a babe.

I started off with a coat of OPI On Her Majesty's Secret Service, which is, well, gorgeous.


Wednesday, September 11, 2013

Little Aquarium Nails


Arden: Hey everyone!  I have a super cute manicure for you today.  I found this picture from the French nail blog Mademoiselle Emma and knew immediately that I needed to try them out for myself.
from http://mademoiselle-emma.blogspot.be/2013/08/nailstorming-retardataire-ocean-etoile.html
I started with my trusty L'Oreal One Stop Base Coat and then added two coats of Zoya Neely.  (This polish was on Lisl and my wishlist for a looooong time before we were finally able to snap it up during a sale.)


I then painted on the seaweed fronds using Wet N Wild Caribbean Frost and one of the smaller brushes from our MASH nail art brush set.  I then added bubbles using Sally Hansen White Out and a dotting tool, and drew on the fish, starfish, and jellyfish using Zoya Arizona (orange), Zoya PixieDust Miranda (texture pink), Zoya PixieDust Liberty (texture royal blue), and Julep sea salt finish Tracy (purplish blue texture polish) using the nail art brush. 


I finished up with a coat of Sally Hansen Insta-Dri Anti-Chip Top Coat (used this one instead of my trusty Essie Good to Go because Zoyas and Essie top coats don't play nice).


I think I probably should've added the bubbles after I drew on the fish, because I ended up having a bunch of bubbles on nails with fish-- the poor fish look a little crowded!


And here's my proof that it's possible to draw on this pattern using your non-dominant hand! (I actually think painting my nails has really helped my non-dominant hand become much more dexterous.  See, mom, there is an upside to my nail polish habit!)

Drawn using my left hand!
Left-handed artwork! And yes, I messed up under the goldfish. But you can barely tell!
Has anyone else tried out any fish-themed nail art recently? (Ok, that might be a little specific.)  But still, tell me what you think!

Tuesday, September 10, 2013

Geometric Nails


Arden: Today's inspiration comes from this tutorial I saw online a week or two ago:


I wasn't super impressed with the argyle pattern in the tutorial, but I REALLY liked the other nails in the picture.  I liked them so much, I decided to recreate them in the same colors and everything!

I started with a base layer of L'Oreal One Stop Base Coat, then two coats of Sally Hansen White Out.  I applied Essie Good to Go to help the white base dry faster.  Once it was good and dry, I applied striping tape in the pattern I wanted, then painted over it with L'Oreal Not a Cloud in Sight and Cover Girl Non-Stop Stone.  After painting each nail (before the polish had a chance to dry) I removed the striping tape using a pair of tweezers.

Here's the previous instructions in a picture tutorial!


I then painted an additional coat of Essie Good to Go on top of each nail, and voila!  Super fun geometric nails!


You can tell in the pictures that I had a little trouble with the white showing through at the tips of my nails.  Not sure what caused this: not painting the grey or real all the way to the tip? adding the top coat while the polish was too wet? It's probably some combination of all of the above.


If you haven't tried striping tape yet, you SHOULD!  It's really really amazingly cheap (we're talking less than a dollar for 10 rolls) and it has a pretty shallow learning curve.  Once you figure out how to remove it with your tweezers, you're basically good to go!

Plus, it is ALWAYS my striping tape nail designs that make people take one look at my hands and go, "HOW DID YOU DO THAT?!?!?"  So try it!


Wednesday, September 4, 2013

Gradient French Manicure


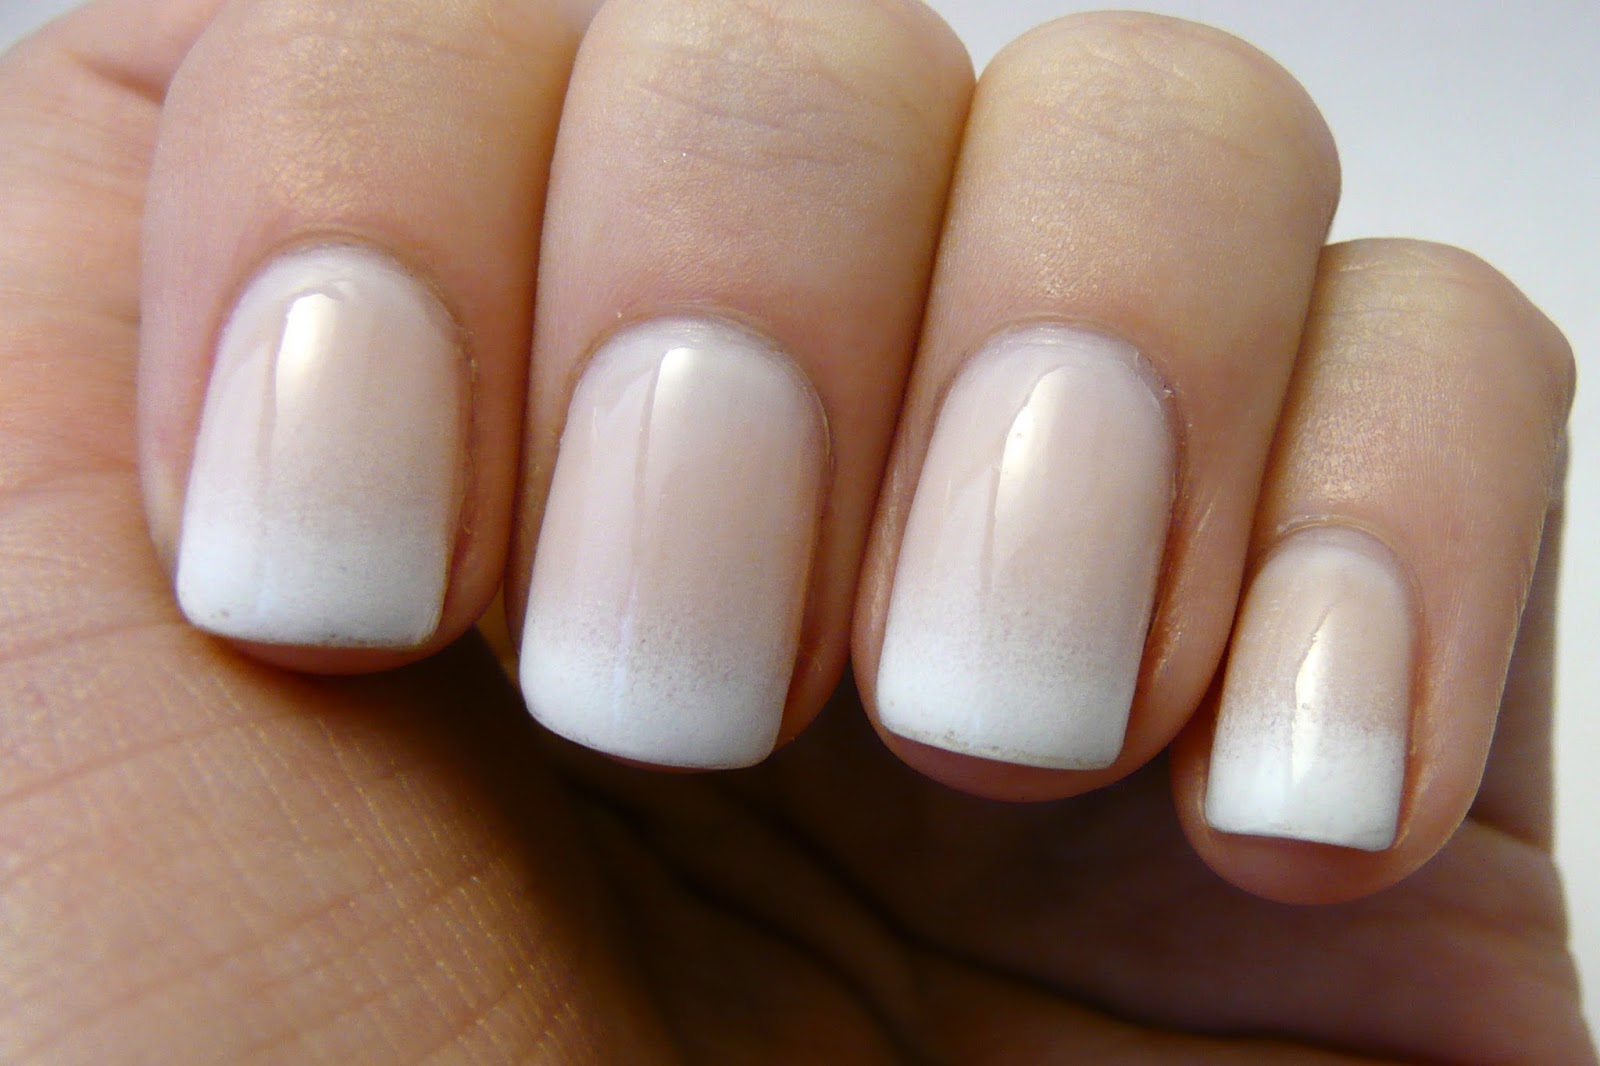
Arden: Hey everyone!  For today's post I decided to go simple, and I'm SO glad I did!  I'd seen this picture popping up on Pinterest for a while, and I finally decided to try my hand at a gradient French manicure.


I started with one coat of L'Oreal One Stop Base Coat, then painted on two coats of Julep Layne (see another simple manicure using Layne here). I followed up the last coat with one coat of Seche Vite, to quickly dry the base coats.

I then applied both Sally Hansen White Out and Layne to a makeup sponge, and sponged on a gradient.  I tried to just sponge the white on top, but think that sponging on both colors as a gradient made it look wayyyy better.  It caused the colors to blend a lot better, and helped there not be a solid line at the end of the white tips.  I finished with a coat of Essie Good to Go.


The one thing I don't like about these nails is how the tips of my nails aren't very neat-- you can tell how the sponging and Seche Vite caused there to be some shrinkage at the tips.  In the future I would probably go back with the white polish and wrap the tips to prevent that messy look on the ends of my nails.


But other than the problem w/ my tips, I LOOOOVE this manicure!  So much more than I thought I would.  And since it's a gradient, it was so so so easy.  I love manicures than can be done quickly, and don't require precise lines or time-consuming artwork.

Since this is such an elegant nail look, I couldn't help posing with my new favorite prop-- my engagement ring!  (Yes, getting engaged three weeks ago is partly to blame for our recent dearth of posts.  And yes, this does mean there will probably be several bridal nail posts in the future-- hope you like them!)


If you aren't looking to do anything crazy on your nails on your wedding day, I think a gradient French manicure might be the perfect option for you.  It's not anywhere near as time-consuming or precise as giving yourself an actual French manicure, and I actually think the gradient version looks better.  I'm not gonna lie, the gradient French has moved to the top of my list of wedding nail ideas!


What do you think?  Like this better than the traditional French manicure?  Let us know!

Tuesday, September 3, 2013

Swatches of Julep's Savvy Suedes Collection


Arden: Today I've got a bunch of swatches of Julep's Savvy Suede collection.  They're unfortunately out of stock online right now, but when they are in stock, they're on sale for $20 for the 5 polishes which is a pretty good deal.

A few notes about these polishes in general: they're matte, so they dry pretty quickly.  This can make applying them a bit tricky.  I basically found that the best way to do it was to work really quickly and use as few strokes as possible.  I also think that the trick might be to just accept that if one coat isn't smooth, it's ok.  You'll be able to fix it on the next coat.  All of the swatches below are done using 3 coats.

First up is Amber, a bronze gold metallic matte polish.


Monday, September 2, 2013

Nail Art Nail-Off: Galaxy Nails


Hey guys! It's Lisl.  So Arden and I have been back and forth crazy traveling all summer and have not gotten a chance to do a proper Nail Art Nail-Off in a while.   But we did it; we did it y'all!  For this Nail Art Nail-Off, Arden decided to go a more traditional galaxy route, and I decided to try out Nailasaurus' pastel galaxy nails!

This manicure takes a lot of nail polish. Like a lot. See?


So, rather than type out, like, every single name of all of them, I'll try to mention as many as I can, and for the rest can just ask us in the comments if you're curious.

Anyway, I started out with a layer of Sally Hansen Bubblegum Pink and some glitter on top of that, because I wanted pink space nails.


Using a make-up sponge, I dabbed on about a million pastel colors of polish, and then some dark purple-sparkly (Zoya Aurora) in the corner for "depth," and then some gold sparkly (OPI Goldeneye) for sparkle.  After all the sponging, you pretty much could not see any of the pinkness or glitter, but that's ok.  One thing I've learned about galaxy nails is you pretty much have to roll with whatever is happening.