Showing posts with label bridal. Show all posts

Wednesday, September 4, 2013

Gradient French Manicure


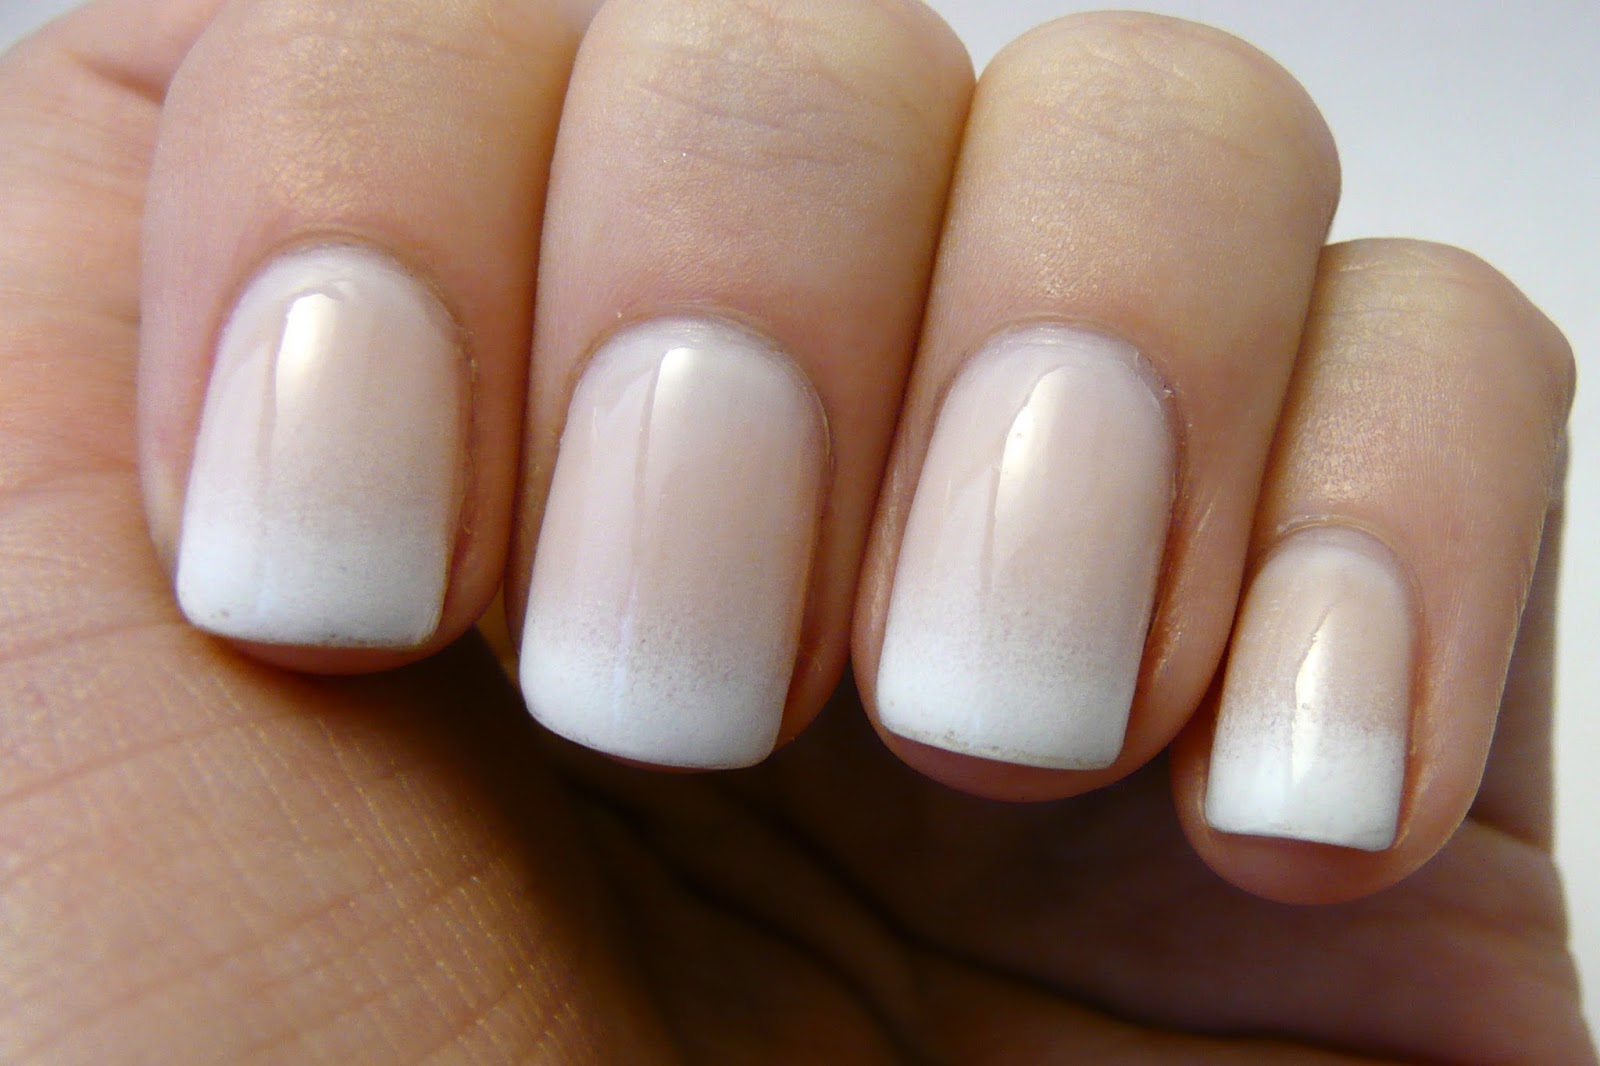
Arden: Hey everyone!  For today's post I decided to go simple, and I'm SO glad I did!  I'd seen this picture popping up on Pinterest for a while, and I finally decided to try my hand at a gradient French manicure.


I started with one coat of L'Oreal One Stop Base Coat, then painted on two coats of Julep Layne (see another simple manicure using Layne here). I followed up the last coat with one coat of Seche Vite, to quickly dry the base coats.

I then applied both Sally Hansen White Out and Layne to a makeup sponge, and sponged on a gradient.  I tried to just sponge the white on top, but think that sponging on both colors as a gradient made it look wayyyy better.  It caused the colors to blend a lot better, and helped there not be a solid line at the end of the white tips.  I finished with a coat of Essie Good to Go.


The one thing I don't like about these nails is how the tips of my nails aren't very neat-- you can tell how the sponging and Seche Vite caused there to be some shrinkage at the tips.  In the future I would probably go back with the white polish and wrap the tips to prevent that messy look on the ends of my nails.


But other than the problem w/ my tips, I LOOOOVE this manicure!  So much more than I thought I would.  And since it's a gradient, it was so so so easy.  I love manicures than can be done quickly, and don't require precise lines or time-consuming artwork.

Since this is such an elegant nail look, I couldn't help posing with my new favorite prop-- my engagement ring!  (Yes, getting engaged three weeks ago is partly to blame for our recent dearth of posts.  And yes, this does mean there will probably be several bridal nail posts in the future-- hope you like them!)


If you aren't looking to do anything crazy on your nails on your wedding day, I think a gradient French manicure might be the perfect option for you.  It's not anywhere near as time-consuming or precise as giving yourself an actual French manicure, and I actually think the gradient version looks better.  I'm not gonna lie, the gradient French has moved to the top of my list of wedding nail ideas!


What do you think?  Like this better than the traditional French manicure?  Let us know!

Monday, August 19, 2013

Glitter Gradient

 
Arden: Hey everyone!  I've been on a bit of a space-themed nail art kick recently.  We'll soon be posting a Nail Art Nail-Off where we both tried out galaxy nails, and I think this glitter gradient manicure just screams "Space, the final frontier" to me as well.


I started this manicure by painting on two coats of Zoya Storm.  Such a cool black polish with glitter!  Then I added the glitter gradient (sorry there are no step-by-step pictures, I'll have to do that next time!).  I painted one coat of China Glaze Pizzazz on the top half of my nail, then added a second one on only the top quarter of the nail.  For good measure, I painted on an additional layer of NYC Starry Silver Glitter on about the top third.  (All of these fractions were totally arbitrary, just so you know.  I just did whatever looked good!)


I finished it off with a top coat of Sally Hansen Insta-Dri Anti-Chip Top Coat (because Essie top coats don't agree w/ Zoya polishes) and was good to go!  This was a quick and fun manicure that doesn't require a lot of pain-staking detail work.  I would recommend it to everyone!


It also was so sparkly that I think it could be a good option for bridesmaid (or even bridal) nails if black is one of your wedding colors!  (I know people have found this blog before by searching "black bridesmaid nails" so I KNOW at least one person is looking for black bridesmaid nails out there!)

Let me know if you try it out!

Wednesday, July 10, 2013

Bridal Nails

Arden here!  As promised last week, here are a couple of bride-specific wedding nail designs I've come up with.

For Design #1, we have this awesome silver cross-hatch pattern:


I started by painting each nail but my ring finger with two coats of OPI My Boyfriend Scales Walls and then two coats of OPI Don't Touch My Tutu to give it a creamier, less white-white look.  On my ring finger I painted two coats of Sally Hansen Celeb City.  I painted a top coat of Seche Vite to help it dry faster.

Then I added striping tape in a cross-hatch pattern on all my nails:


And then I painted Celeb City on each nail (except my ring finger) and immediately removed the tape.  On my ring finger I painted a coat of My Boyfriend Scales Walls and Don't Touch My Tutu before removing the tape.


For Design #2, I was looking to go more sparkly, and incorporate some gold as well as silver.