Showing posts with label stripers. Show all posts

Monday, November 4, 2013

Ladybug Nail Tutorial


Arden: Hey everyone! Today's prompt in the 33 Day Challenge is to follow someone else's tutorial.  I chose to create these cute ladybug nails, following a tutorial from the blog Swatch and Learn.

And since I haven't done one of these in a while, I decided to create my own step by step tutorial as well!

I started by painting my nails with a base coat, then two coats of Julep Jackie (aka the best red polish ever).


As you can tell in the photo, I didn't get full coverage from two coats, but knew I was about to paint the tips black so I figured it would be fine.

After that, it was really easy.

1. Paint a black line with a striper brush to help mark the face of the ladybug.

2. Fill in the tip with a black polish (I used Sally Hansen Black Out).

3. Paint another black line down the center of your nail.

4. Add black dots on either side of the line using a dotting tool.

5. Add white dots at the tip using a dotting tool.

6. Add small black dots on top of the white to finish the eyes.  (This wasn't in the original tutorial, I just thought it would make the eyes cuter.)

Here's the finished product:


I love these little guys!  They're so cute!  And for a 100% freehanded design, these were pretty quick and easy!  Definitely a good manicure design for a beginner to try.

Let me know how you like them, and check out everyone else's entry in the 33DC today below.


Tuesday, October 22, 2013

33DC Chinese Tiger Pillow Thing Nails


Hey y'all! It's Lisl.  I'm a little bit behind on 33 day challenge manicures (I skipped Friday's) and I'm posting this one late on Monday! But, anyway, it's Chinese nails day! Every time my Mom comes back from China, she brings me back something new, so I had a whole house full of inspiration, and I had to choose what to use.

Since it was late Sunday and I was a little bit crazy-pants, I wanted to do something simpler, so I chose to base a manicure on this tiger neck pillow thingy.


Friday, August 2, 2013

As Seen on Pinterest: Geometric Lines


 Arden: Hey everyone!  Here's another installment in my As Seen on Pinterest series!

First, the inspiration:

from: http://media-cache-ec0.pinimg.com/originals/ae/3a/77/ae3a7799bae0cdc8040a0f62c9c79c13.jpg
Those are pretty cool, right?  I saw them and had to try them out!

I started with a base of two coats of Julep Bunny.  (Let's be honest, I did this manicure right after I swatched Bunny, and that's why I used it!)


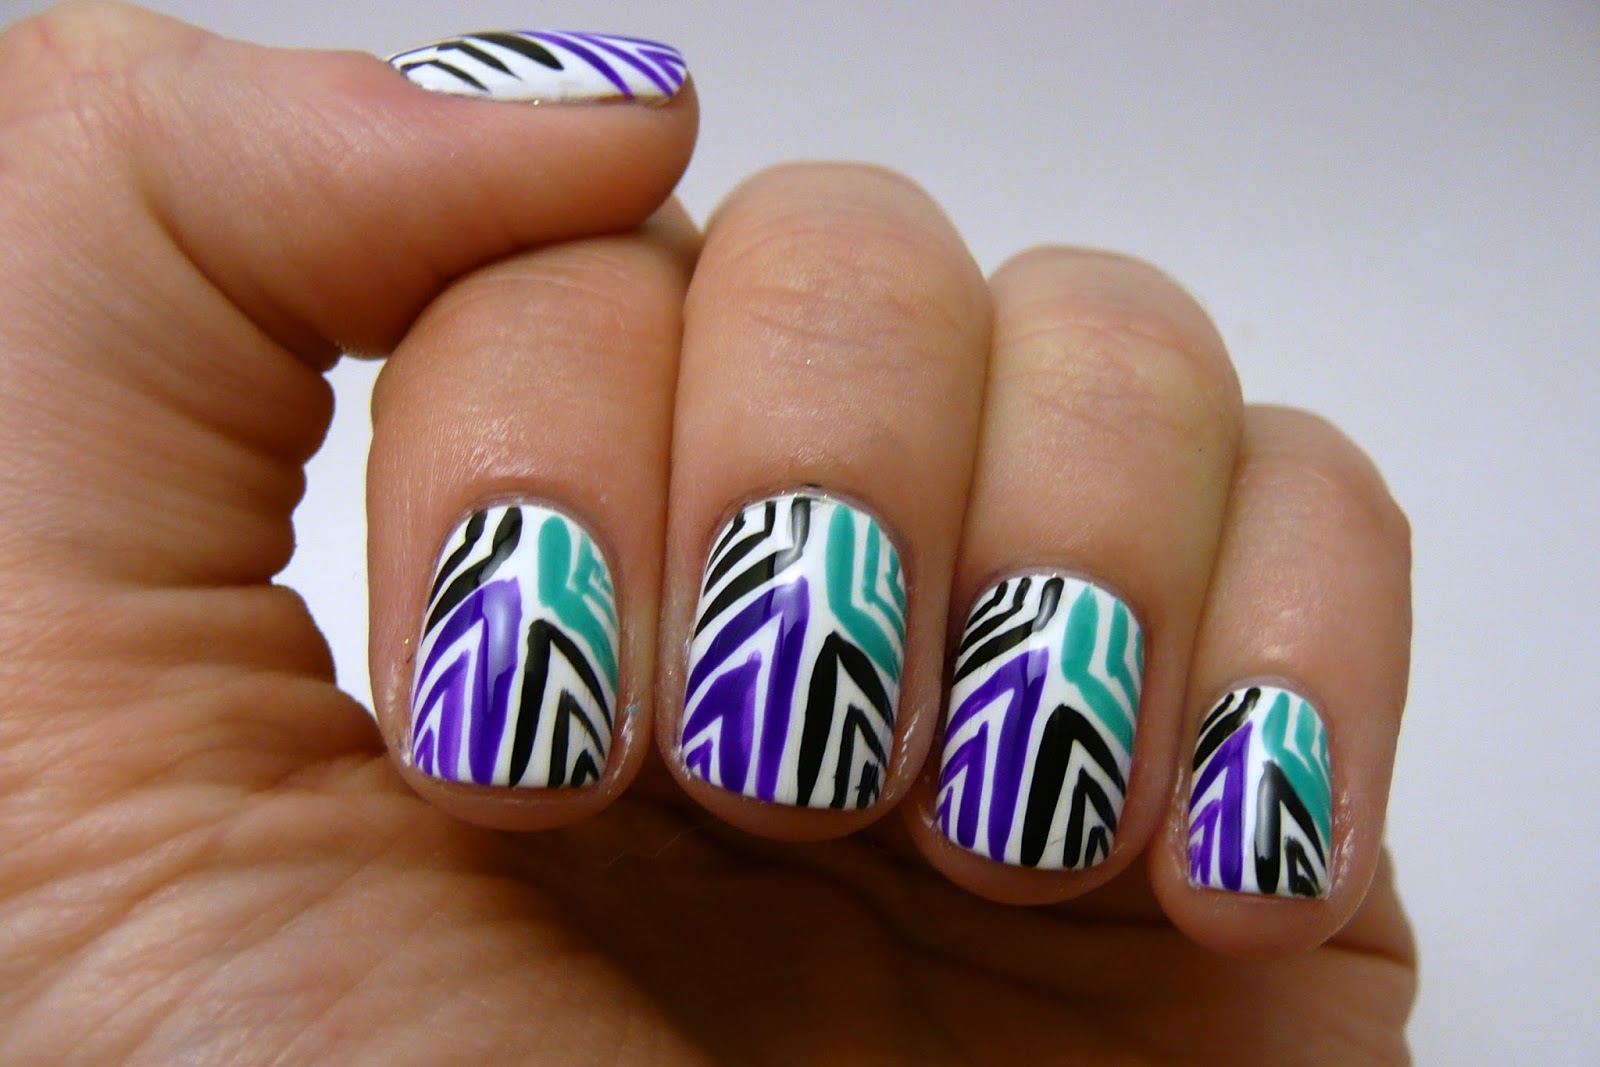
I followed the tutorial above.  I first added the top left section of black lines using our black Color Club striper polish.  Then I did the top right section using Julep Eden (I told you I'd already used it in a bunch of manicures!) and a striper brush from our MASH nail brush kit. 


Up until this point, things were going pretty well.  I was thinking, "These nails look awesome!  I am doing such a great job of making good-lucking, straight lines."

Then the wheels came off the wagon a little bit.  The third section I painted on was the teal quadrant, using L'Oreal Not a Cloud in Sight.  I don't know if it was just a problem with this polish, or if I was getting tired, or if I was just fated to stop making good lines, but this was a little bit of a problem.  It seemed like NONE of the lines were straight-- they all came across thick and goopy.  Alas.  I finished by adding the final black section, but by then I was a little demoralized and so those lines weren't very crisp either.


Now that I can look back with more perspective, I think as a whole these look pretty ok.  They're not the best (and certainly not as well-done as the original post from Pinterest) but I think as a whole they look pretty cool.


I'm going to have to try them again sometime and see if I can do better!

Monday, July 29, 2013

Gradient Leopard Print Nails

 
Arden: Hi everyone!  Today I've got this fun twist on leopard print nails!  I promise I saw the idea for these on the internet SOMEWHERE, but of course I forgot to write it down/save it/pin it, so now I can't properly cite my inspiration.  If you happen to see something really similar to these out there, please leave a comment so I can add the original.

I started by painting my nails with two coats of Essie Blanco.  (This isn't my favorite white nail polish ever, but my OPI My Boyfriend Scales Walls is running out, so I've been looking to other white polishes in my collection to pick up the slack.)


Then I sponged on a gradient on the tips using the white and a light purple and teal.  For the purple nails I used L'Oreal Royalty Reinvented and for the teal ones I used Zoya Wednesday and then Essie Mint Candy Apple on top of that.  (I originally meant to use the Essie, but had Wednesday sitting on the table next to it and accidentally picked up that and used it before realizing my mistake.)


Then I made some splotches on my nails using Zoya Mira and Zoya Wednesday.  I irregularly outlined those spots using Lisl's black Color Club striper polish.  I tried to make those black outlines in C shapes (so not fully outlining the colored splotch).  In the below picture the purple ones are outlined, the teal ones aren't yet.

Thursday, July 4, 2013

Flag Nails: Happy Birthday, America!


Arden: Happy July 4th, everyone!  Here are the patriotic nails I'm rocking today.


I started by painting my nails with two coats of OPI My Boyfriend Scales Walls.  Then I added the red stripes using our Color Club red striper polish.  Next, I painted on Butter London Blagger using one of the flat brushes from our MASH nail art brush set.  And finally I added the white dots using a dotting tool.


Friday, June 21, 2013

Zooey Deschanel Stripy Nails


Arden:  We are BIG New Girl fans here at the Casa de Polish.  It's probably the one show that we DVR and watch multiple times throughout the week.  And coincidentally enough, its star, Zooey Deschanel, is pretty well known for her fabulous manicures.  She got a little camera and film strip painted on for the Golden Globes last year, and teeny tiny televisions for the Emmys.  While most of those are too ambitious for me to try out right now, I was browsing the internet a few days ago and found this picture that Zooey Deschanel posted a while ago and thought, "I could do those!"

from http://instagram.com/p/J7Fkk_Ljl_/
I started by painting my nails with two coats of Zoya Wednesday.  I started by dipping the striper brush from our Mash nail brush set in both Essie Mint Candy Apple and OPI Did It On 'Em and then making little X's in both of those colors.  I finished by adding a few more stripes using our gold and silver Color Club striper polishes.  I finished with a top coat of Sally Hansen Insta-Dri Anti-Chip Top Coat because Essie Good to Go doesn't work well with Zoya polishes (a phenomenon that I will some day devote an entire post to).


Wednesday, May 22, 2013

Florida Nails


Arden here: Hi everyone!  I'm super excited to report that I'm headed out tomorrow to visit family in Florida for a week!  I can't wait!

To celebrate my impeding vacation, I painted my nails to match my destination!  After an extensive Google search for "Florida nail art" I discovered this design.  I wasn't sure if I'd be able to pull it off, but I think I did a pretty good job.

I started by painting my nails with two coats of L'Oreal Not a Cloud in Sight.


I then cut up a make-up sponge into little pieces and used each on to sponge on a different color of the sunset.


Thursday, May 9, 2013

I Can't Afford That: Valentino Ricamato Daisy Cap Sleeve Dress


'Sup, it's Lisl. Welcome back to "I Can't Afford That", my sporadically appearing feature where I paint my nails in the style of expensive clothing that I want so bad, but will never own.  Today I've got a manicure inspired by this beautiful white floral Valentino dress, which, should you have an extra 5,000 dollars lying around, is yours to buy and keep and probably spill ketchup on.  Huzzah!

Wednesday, April 24, 2013

As Seen on Pinterest: Half Stripes


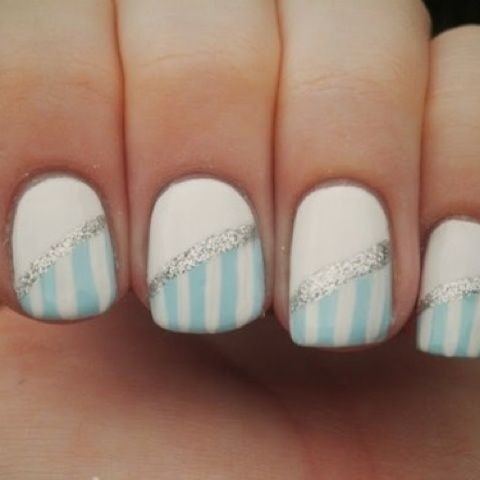
Arden: I pinned this a few weeks ago, and finally just got the chance to try it!

Pic from http://loveit.com/loves/P0BKYawjC2B_9LwDXfvH7T- As always, if you know its original creator, please let me know!
I REALLY liked the original color combination, but A) I didn't want to directly copy this design, and B) I paint my nails white A LOT for various nail art designs so I wanted to do something different!

Instead of white and light blue, I decided to move everything down a shade and do light blue and dark blue.  For my light blue, I used my new Essie Bikini So Teeny. 
Not sure how I didn't notice that hair on my nails when I took all these pictures....

Saturday, April 13, 2013

I Can't Afford That: Kate Spade Saturday Tree Paints

I Can't Afford That: Manicures Inspired by Clothes I Can't Afford

OMG GUYS.  Look at these pants.  THEY HAVE TREES ON THEM. Trees. On the pants. I found these cuties on Fashionista, they're from the upcoming Kate Spade offshoot Saturday's fall collection, and I want them.

I want them, but I cannot have them, because even though 100+ dollars is reasonable to spend on, like, everyday jeans, I can't just go buying tree pants willy nilly, I have to wear regular clothes sometimes. (Full disclosure: right now I am wearing a muumuu).

Back to tree pants.  I couldn't have trees on my paints, so I put trees on my nails.


Saturday, April 6, 2013

NOTD: Sunshine Nails


Arden: I've got a quick nail of the day post for you today.  It was a beautiful spring day, and I just wanted something happy and sunshine-y on my nails!

I started by painting my nails light yellow (L'Oreal Creme Puffs).  Then I sponged on a 3 color gradient using Sally Hansen Insta-Dry Lightening, Cover Girl Outlast Stay Brilliant Coral Silk, and Sinful Colors Big Daddy.


But I worried that they looked a little too much like candy corn, so I decided to turn them into sun rays.  Had I been thinking of this in the beginning I would've used striping tape, but it was too late for that!  So I borrowed Lisl's white Color Club striper polish.


 And then I made it sparkly by adding a coat of the gold flakie polish from the Revlon Moon Candy set "Universe" and followed it up with an additional coat of Revlon Snow Flurries.


I wasn't crazy about the finished product (all of the glitter coats on top made it kind of bumpy, even after I added a clear top coat), so I think I will definitely try a sun-themed manicure again in the future!


Thursday, March 21, 2013

Nail Polish Swatches: Color Club Art Club - Nail Art Primaries Collection


So a while ago, we found out on the internet that stores like Marshalls, and Ross and K-Mart sell nice nail polish for cheap.  So, never one to pass up a deal, Arden intrepidly went on a scouting trip and called me to say that this set of striper polishes from Color Club/Art Club was being sold for $9.00.  I've never tried any striper polishes, plus it seemed like a good deal so I decided to test it out!

I spent one day practicing different patterns on the back of the box.  Then, over the course of about a week and a half "swatched" them in different patterns over Sally Hansen Xtreme Wear Black Out, and White Out.

I started out with a manicure inspired by a mug Arden gave me for Galentine's Day, my favorite holiday of the year.  For the uninitiated, Galentine's day is the day before Valentines day and it's the day we celebrate our female friendships!