Showing posts with label stripes. Show all posts

Tuesday, September 24, 2013

Blue Waterfalls


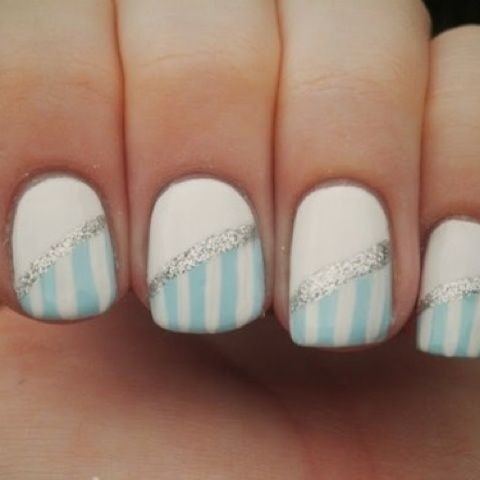
Arden: Hey everyone!  I'm emulating the Nailasaurus' new favorite nail art technique again today!  I've already done a colorful (feathery) version as well as a green (wormy) version, but today I decided to try out a monochromatic striped look, much like the Nailasaurus' original blue waterfall.

[I think this post is going to be very picture-heavy and not terribly explanatory, so if you'd like more details on how to do this pattern yourself, follow the Nailasaurus' tutorial here.]


I started with a base coat, and then added two coats of CoverGirl Outlast Stay Brilliant glosstini Blue Hawaiian.  I then used one of the striper brushes from our MASH nail art brush set to add stripes on top in a variety of blue shades.  I started at the base of my nail, and brushed upward (as straight as I could) toward the tip.


Colors used in the stripes:
Essie Midnight Cami
Essie Blue Rhapsody
Essie Butler Please
Essie Beach Bum Blu
Zoya Liberty
Julep Tracy


I'm not gonna lie-- I wasn't too thrilled with these nails until I added Liberty and Tracy-- two colors that are texture polishes that are packed with glittery goodness.  With a top coat added on top at the end you couldn't tell at all that they were textured, and their glittery-ness (that really needs to be a word) really kicked this manicure up a notch.  It made me want to get more glittery polishes to add that little bit of kick to my nail art designs all the time!


What do you think?  Have you tried out the waterfall look yet?  Hit us up in the comments!

Monday, July 15, 2013

Gradient Candy Stripe Nails


Arden: Hi, imaginary friends!  So sorry for our spotty posts last week-- I was out of town on leading my youth mission trip, where I often didn't have cell service, much less Internet access and nail polish supplies.  But I'm back now and excited to share my mission trip nails with you!

Before I left on my trip, I put a lot of thought into what manicure I wanted to sport on my nails for the whole week I was gone.  I ultimately decided on this gradient candy stripes design I found on Pack a Punch Polish


I started by painting my nails white using OPI My Boyfriend Scales Walls.  I decided that instead of doing my usual base coat + two coats of white, I'd follow these directions Julep published recently.  So, I painted a base coat, one coat of white, a matte top coat, and then another coat of white.  Not gonna lie, didn't really see a huge difference in how evenly my white coat looked.  Sorry, Julep, don't think I'll be using your method again.

Then I applied striping tape in diagonal lines across my nails (three pieces per nail).  Following the instructions on Pack a Punch Polish, I then sponged on brightly colored gradients doing each color individually on the sponge.  In retrospect, I think my colors would've blended a lot better if I'd followed my usual gradient method of applying several colors on the sponge at once.   If you try these out, let me know which way you think works best!


Monday, July 8, 2013

Colorful Feathery Striped Nails


Arden: When I saw The Nailasaurus' striped manicure technique last Friday, I instantly knew I wanted to try it out!  I initially was just going to use a couple of colors (greens, blues, and purples), but before I knew it I'd ended up using nearly every shade of the rainbow, and I loved it!  Though I wasn't thinking about it going in, the end result really reminded me of some kind of multicolored furry creature that might be in a Dr. Seuss book.  What do you think?

I started by painting my nails with two coats of L'Oreal Creme Puffs.


I thought that looked a little too yellow for the neutral base color I was going for, so I ended up adding two coats of OPI Don't Touch My Tutu and it worked perfectly to transform the color into a little creme shade:


Next, I started adding color!  Using one of the striping brushes from our MASH nail art brush set, I striped on lines of each color.  I tried to alternate between long brush strokes and shorter ones, as well as between darker colors and lighter ones.  I didn't want all of the darker colors to get covered up by the lighter colors, or vice versa.


Tuesday, June 18, 2013

As Seen on Pinterest: Nautical Nails


Arden: We haven't done one of these in a while!  I guess I've been getting my nail inspiration from places other than Pinterest.  Today I recreated this design, which I pinned many moons ago:

from http://thebeautydepartment.com/2012/01/mani-monday/

I didn't have any of those straight across manicure strips to make the white lines with, so I decided to just use regular Scotch tape.  This did NOT work as well as I thought.  It was a major struggle to cut the tape narrow enough to fit a couple of white stripes on my nails without it being too narrow or crooked.


I started my painting my nails with two coats of OPI My Boyfriend Scales Walls.  After it dried, I applied the tape and painted on a thick coat of Chanel Blue Satin.  (In retrospect, I should've chosen a different navy blue-- that one looked practically black, even over the white.)  And then I finished up by drawing on tiny hearts with our Color Club red striper polish.


This manicure really wasn't executed well.  The navy polish bled onto the white really badly (you can tell on my ring finger where I had to cover it up with white polish) and in these close up pictures it's pretty obvious none of the stripes are straight.

Oh well, you live, you learn.  Chalk this one up as a "manicure I'll never do again and would advise you not to try either!"

Wednesday, April 24, 2013

As Seen on Pinterest: Half Stripes


Arden: I pinned this a few weeks ago, and finally just got the chance to try it!

Pic from http://loveit.com/loves/P0BKYawjC2B_9LwDXfvH7T- As always, if you know its original creator, please let me know!
I REALLY liked the original color combination, but A) I didn't want to directly copy this design, and B) I paint my nails white A LOT for various nail art designs so I wanted to do something different!

Instead of white and light blue, I decided to move everything down a shade and do light blue and dark blue.  For my light blue, I used my new Essie Bikini So Teeny. 
Not sure how I didn't notice that hair on my nails when I took all these pictures....

Thursday, March 21, 2013

Nail Polish Swatches: Color Club Art Club - Nail Art Primaries Collection


So a while ago, we found out on the internet that stores like Marshalls, and Ross and K-Mart sell nice nail polish for cheap.  So, never one to pass up a deal, Arden intrepidly went on a scouting trip and called me to say that this set of striper polishes from Color Club/Art Club was being sold for $9.00.  I've never tried any striper polishes, plus it seemed like a good deal so I decided to test it out!

I spent one day practicing different patterns on the back of the box.  Then, over the course of about a week and a half "swatched" them in different patterns over Sally Hansen Xtreme Wear Black Out, and White Out.

I started out with a manicure inspired by a mug Arden gave me for Galentine's Day, my favorite holiday of the year.  For the uninitiated, Galentine's day is the day before Valentines day and it's the day we celebrate our female friendships!